A concrete slab that fails within five years almost always traces back to something that happened before the truck even arrived, or in the 28 days after the crew left. Concrete work looks simple from a distance: pour it, let it sit, done. In practice, each stage has specific tolerances that determine whether a driveway lasts 30 years or starts spalling by year three. Here’s what actually happens between the excavation and the final cure.
Site Preparation and Formwork
Every pour starts with excavation to a depth that accounts for the slab thickness plus a gravel base, typically 4 to 6 inches for a residential driveway or patio, 8 inches or more for anything supporting vehicle traffic like a garage floor or commercial pad. The excavated area gets a layer of compacted gravel, usually crushed stone in the 3/4-inch range, compacted with a plate tamper in lifts of no more than 4 inches at a time. Skipping proper compaction is one of the most common causes of slab cracking, because the ground settles unevenly underneath the concrete after the fact.
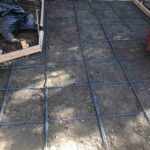
Formwork comes next, built from 2×4 or 2×6 lumber staked every 3 to 4 feet, set to the exact grade and slope needed for drainage. A driveway typically needs a slope of about 1/4 inch per foot away from a structure. Before any concrete goes in, a vapor barrier (6-mil polyethylene sheeting is standard) may be laid down for interior slabs to control moisture migration. Reinforcement follows: wire mesh, rebar on chairs to keep it centered in the slab, or both, depending on the load the slab needs to carry.
Ordering and Mixing the Right Concrete
Concrete strength is measured in pounds per square inch (PSI), and the mix has to match the job. A standard residential sidewalk or patio uses 3,000 to 3,500 PSI concrete. Driveways and garage floors that see vehicle weight need 4,000 PSI or higher. Areas with freeze-thaw cycles need air-entrained concrete, meaning tiny air bubbles are mixed in (typically 5 to 7 percent air content) to give the water somewhere to expand when it freezes, instead of cracking the slab from the inside.
The water-to-cement ratio matters more than most people realize. A ratio between 0.45 and 0.50 produces strong, durable concrete. Adding extra water to make the mix easier to pour, a common request from crews trying to save time, weakens the final product significantly. A slump test checks this on site: a cone of wet concrete is filled, the cone is lifted, and the amount the concrete slumps down is measured. A slump of 4 to 6 inches is normal for most flatwork. Anything much wetter than that signals a compromised mix.
The Pour
Concrete needs to go from the truck to its final position with as little handling as possible, since excessive raking or pushing separates the aggregate from the paste. Chutes, wheelbarrows, or pump trucks move the mix into the forms, and workers use shovels or come-alongs to settle it, not to move it long distances. Once it’s in place, a vibrating screed or hand screed levels the surface to the top of the forms, working in a sawing motion to eliminate air pockets and consolidate the mix around the reinforcement.
Timing matters immensely here. Concrete typically sets up within 30 to 90 minutes depending on temperature, humidity, and the specific mix design. In hot weather (above 90°F), set time speeds up and crews have a narrower window to screed and finish before the surface gets too stiff to work. In cold weather (below 50°F), set time slows down, and pours often get delayed or use accelerating admixtures like calcium chloride to keep the schedule on track.
Finishing the Surface
After screeding, the surface goes through several finishing stages, each timed to the concrete’s moisture state:
- Bull floating happens immediately after screeding, using a long-handled tool to knock down high spots and push large aggregate slightly below the surface.
- Edging comes next, rounding the perimeter of the slab with an edging tool to prevent chipping.
- Once the bleed water (the thin layer of water that rises to the top) has evaporated, a steel trowel or power trowel creates a smooth, dense surface. Troweling too early traps bleed water under the surface and causes scaling or delamination later.
- For exterior slabs, a broom finish is dragged across the surface after troweling to add slip resistance, since a glass-smooth exterior surface becomes dangerously slick when wet.
Control joints get cut within 6 to 12 hours of finishing, either tooled by hand or cut with a saw, spaced roughly 2 to 3 times the slab thickness in feet (a 4-inch slab gets joints every 8 to 12 feet). These joints give the concrete a planned place to crack as it shrinks, instead of cracking randomly across the surface.
Curing: The Step Most People Rush
Concrete doesn’t dry, it cures, and the distinction matters. Strength develops through a chemical reaction between cement and water called hydration, and that reaction needs moisture and time to keep going. Concrete reaches about 70 percent of its design strength in the first 7 days but doesn’t hit full strength until around 28 days.
Proper curing keeps the surface moist and at a stable temperature during that window. Methods include covering the slab with plastic sheeting, spraying on a liquid curing compound that seals in moisture, or periodically wetting the surface with a hose for the first several days. Letting a fresh slab dry out too fast, especially in hot, windy, or low-humidity conditions, causes surface cracking and reduces long-term strength by as much as 30 percent compared to a properly cured slab. Foot traffic should wait at least 24 to 48 hours, and vehicles should stay off for a full 7 days at minimum, ideally the full 28.
If you’re planning a concrete project, ask your contractor directly about the PSI rating they’re specifying, the slump they’re targeting, and how they plan to cure the slab once it’s poured. Those three answers tell you more about the quality of the work than anything else you’ll see before the truck shows up.
Related articles: Foundation Settlement: What Causes It and How Contractors Actually Fix It · How to Compare Concrete and Foundation Bids Without Getting Fooled by the Lowest Number · What a POS Quote Doesn’t Tell You: Hardware, Software, Processing, and the Fine Print